
Well, a few years ago we had a bunch of weddings to go to. Now, we have a bunch of baby showers. You know me: the one that loves crafts! Why would I get something off of a registry when I can make it and have it be a more personal gift? Well, I have now made three of these Diaper Cakes (all three were tricycles), and so I thought I would put a tutorial up, in case you want to try it.
Here’s a warning, however: you have to use both of your hands, your knees, your chin, safety pins, and patience for this craft. Now that I have done it enough, I can do it without too much trouble, but it helps to have practice before giving it away.
Supplies: 1 baby bottle, 1 pair of socks/footies, 2-4 rubber bands, 2 receiving blankets, 2 bibs, 1 pack of 40ish diapers. I like using size 2 diapers, as it allows the new parents to have it as a display when the baby is first born, and then when the baby move up to size 2 diapers, they can take it apart.

1. Take about 15 diapers and layer them so they look like this:


2. Starting at the end of the diaper chain where there is the unfolded diaper end (not shown in the picture above), roll the diapers up. This is where you will need your chin, knees, both hands, and maybe a friend to help. Some suggest to use a round cake pan as a mold, but I did not have much luck with this technique.

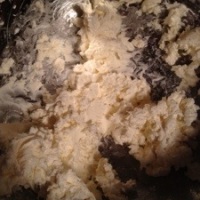
3. Make lots of adjustments until the diapers are evenly spread out.

4. Secure them with a rubber band.

Your rubberband may break, so have extras on hand.

5. This is not the way it should look, so tuck any unclean parts in.

6. You will want to make sure that there is a hollow center in your wheel.

7. Repeat to make 2 more wheels. You can have them all be the same size, or you can have 2 of one size and 1 larger one (for the front).


8. Take one corner of your receiving blanket and start rolling it from that corner.


Thank goodness for my organized craft room baskets! Now I can easily find the safety pins!

9. Secure that part of the blanket and weave it through the two wheels. I like to hide the pin right in the middle of the wheels, as you will push them together.

10. Weave the rest of the blanket through the other wheel and secure with a hidden safety pin.

 11. Roll the other receiving blanket the same as you did the first. This will be your handlebar.

12. Thread it through the front wheel and up.
13. Place the baby bottle in between the wheel and the blanket to act as a headlight. Tie the handlebars together with a tie or rubber band. Put the booties/socks on the handlebars and grippers. Put the bibs on the seat and over the wheel. You can also cover the rubber bands with ribbon if you want a cleaner look.


Voila! Your diaper tricycle!
You can alter it to make a bike (2 wheels) or dirt bike (4 wheels).


I love the monkey plush doll that you used! It complements your motorcycle diaper cake perfectly!
Thanks so much! Picking out the stuffed animal is the hardest and most fun part of the shopping process for these “cakes!”
yea, it is.
yes, it ties it all together. again, nice job!
Before planning a baby shower program we used to first prepare for a baby shower program and in a baby shower program we found a number of baby diaper cakes presented by friends and relatives. In the above article we can found some related diaper cakes and the process for how to prepare a diaper cake especially for a baby shower program.
Pingback: How to Make a Diaper Cake : 50 DIY Diaper Cake Tutorials
Hi,
I just wanted to add a couple of tips if you don’t mind.
I used a bundt cake pan to round the diapers and it worked perfectly.
I also used a rubber band to hold the diapers and then hot glued a 1 1/2″ ribbon around the tires then removed the rubber band. I made a minnie mouse bike so the polka dot ribbon around the tires looked quite nice.