I have had a skirt-making obsession over the past few days. I am not in love with all of them (do I blame the fabric or my sewing skills?), but I have made them! I want to feature 2 of new ones, and I will explain how I created them differently than the aqua skirt (click here to see how I made that one).
I will start with my pink striped jersey skirt. I fell in love with this material from Joann’s or Hancock (I can’t remember which one), and it was just screaming at me to turn it into a pleated skirt. I am so glad I listened.
To start with, I decided that I wanted the stripes to run up and down, as I felt like it wouldn’t accentuate the width of my hips as much as if it was side to side. This decision made it a little more difficult, as it was cut to be used side to side, but I made it work.
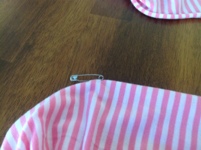
I measured out enough to make it wrap around my waist 1 3/4 times. Then, I carefully folded the skirt over so that it would have 2 layers of material. Because I was dealing with stripes and mistakes would be easier to notice, I was especially careful with the measuring (21 inches long) and laying out of the material. I put safety pins at the folded section (the top of the skirt), so I would have an exact point for the top. Of course, I didn’t have any power when I was doing this step, so I couldn’t steam it or iron it to have a good crease (does jersey knit iron anyone?).
Then, I took my extra-thick white elastic (I believe it was 2 inches wide), and I measured it around my waist to see how large I wanted it. For my other skirts, I would do this at the end. For this pleated skirt, I needed to know exactly how much elastic I would use. Once I had my elastic sized, I put a safety pin at the start and end of the elastic, to use as place markers.
It was time to start pleating. Carefully, I created a modified accordion fold. I made sure to safety pin each fold. This didn’t have to be perfectly spaced out, but it ended up being about 1 to 1 1/2 inches apart.
To make sure that I wouldn’t run out of pleating towards the end, I also safety-pinned the end of my fabric to the end of the elastic. That way, I could mentally and physically space it out while working. As it was, I ran out of material to pleat, so there is a 4 inch section that isn’t pleated. I probably could have gone back to fix it, but I was so tired after this point, that I decided not to worry about it.
Once the power turned back on (the next day), I sewed through all of the pleats, thus attaching the material to the elastic. Don’t forget, if you use safety pins, to take them out one by one prior to sewing. If you forget one, you will get a broken needle. 😦
Once I was finished, I decided to go back and re-sew over those pleats with a new stitch from my amazing sewing machine that goes over each section 3 times. This was to reinforce the original section, as I didn’t want my skirt ripping the first time I wore it out. Of course, I later realized that the elastic isn’t as stretchy anymore, as I used regular thread (and regular thread doesn’t stretch if it has gone over an area a total of 4 times). Now, I just have to put the skirt on over my head.
The last step was to sew the elastic sides together and sew up the material, and I was done. Easy! Since this was not going to be a reversible skirt, I just sewed all 4 layers together, facing the inside of the skirt.
Now, it’s all done! What do you think of it? I have to say, I love how flirty and cute it is! I think all of my jersey skirts will be this style (although I may use less fabric so that it isn’t as full).
Which way do you like the elastic band: tucked in so you can see the pleats or nice and wide? Tim and I disagree with how to wear it. I won’t tell you yet who prefers each style.
The back (showing the stitching to connect the two ends of fabric):


i like your blog, dory! 🙂 and how you break down the projects simple enough, and they are CUTE! 🙂